Are you trying to build a website using WordPress? Building a WordPress website may sound like it is a difficult task, especially if you are not techy. Don’t worry; you are not alone in this.
Even though it may not seem important at the start to know how to make a website, it is a must-have skill for small business owners today, and here is why.
- Save time by eliminating web developer and designer costs.
- Quickly adapt to marketing trends on your website without requiring a programmer.
- Outrun your competition by relying on your DIY skills to avoid lengthy developer consultations.
In this guide, I’ll take a deep dive and show you all the steps needed to get your website up and running in a short time.
How to Make a WordPress Website – The Bird’s View
The process of creating a WordPress website requires only 8 steps. This is all you require to create a professional WordPress website at the end.
To embark on this journey, you’ll have to start by picking a platform, selecting a perfect domain name, or choosing a reliable hosting service. Then, we’ll look into setting up WordPress and customizing its themes and plugins. Let us get going to be equipped to launch your very own site.
Why Building a WordPress Website is the Right Move?
At its core, WordPress is an open-source piece of software, which means that its codebase is public for individuals to see and use.
The solution is free, and you can use the same adaptable and user-friendly publishing system that is used by several internationally-known brands or publications. The always-free tool comes with numerous free plugins and themes to enhance your website performance.
Additionally, the WordPress community spans a vast area worldwide, so you get a wealth of knowledge and experience with friendly assistance. The open-source software has a constantly growing community of developers on new projects related to Content Management Systems or CMS. So, building a website using WordPress is the best course of action that you can take.
How to Create a WordPress Website
Starting with a new WordPress website is a quick and easy process. Let me walk you through how it works, each step at a time.
1. Buy and Register a Domain Name and Hosting
When you are planning to make a website, picking a name is a fun aspect of the entire process. After all, you get complete freedom to pick any name you wish for your website. However, there are several things that you’ll need to understand to set yourself up for success in the ever-changing world.
To start off, there are over 1.13 billion websites in 2024, so trying to stay original is quite challenging. So, selecting a great domain name and web hosting is an essential component for your business growth.
It is a great idea to construct your domain name around your organization’s name or a phrase associated with the niche you are in, but add words for better functionality.
In simple terms, a good domain name has to be
- Brandable
- Easy to memorize
- Short and simple
- Easy to type and hard to mix up
- Include niche-related keywords
The cost of a domain name is based on its availability, as something that is trending or popular may be quite expensive. However, with the right domain registrars, you can get started at a cheap rate.
Pro Tip: I recommend using Namecheap to grab your domain. It should take yopu 2 mins to pop in, grab a domain and continue with this tutorial.
After you have selected the domain name, you’ll need to register for it and also buy a hosting package on the go.
There are hundreds of companies that sell hosting packages to run your website. However, let’s not complicate things and select one of the strongest contenders in the market.
I’m talking about WP Engine, here is why
- WP Engine is the best-managed WordPress hosting solution and ensures that your website operates without any hiccups.
- It has excellent security to keep your site protected from malware or data leaks.
- The servers of WP Engine are optimized for WordPress using the Evercache technology, which makes your website load faster. You can also get access to CDN, which helps boost your performance.
- Has excellent reliability with a superior front-end layer system that helps handle traffic spikes without slowing down your site.
- A great support team that comprises trained WordPress experts to resolve any issues or queries.
- Its Smart Plugin Manager automatically checks and updates plugins every night. This means that when upgrades are available, your website will never break down.
- An array of hosting plans, starting as low as $13 per month.
Get 4 Months Free Of WP Engine WordPress Hosting
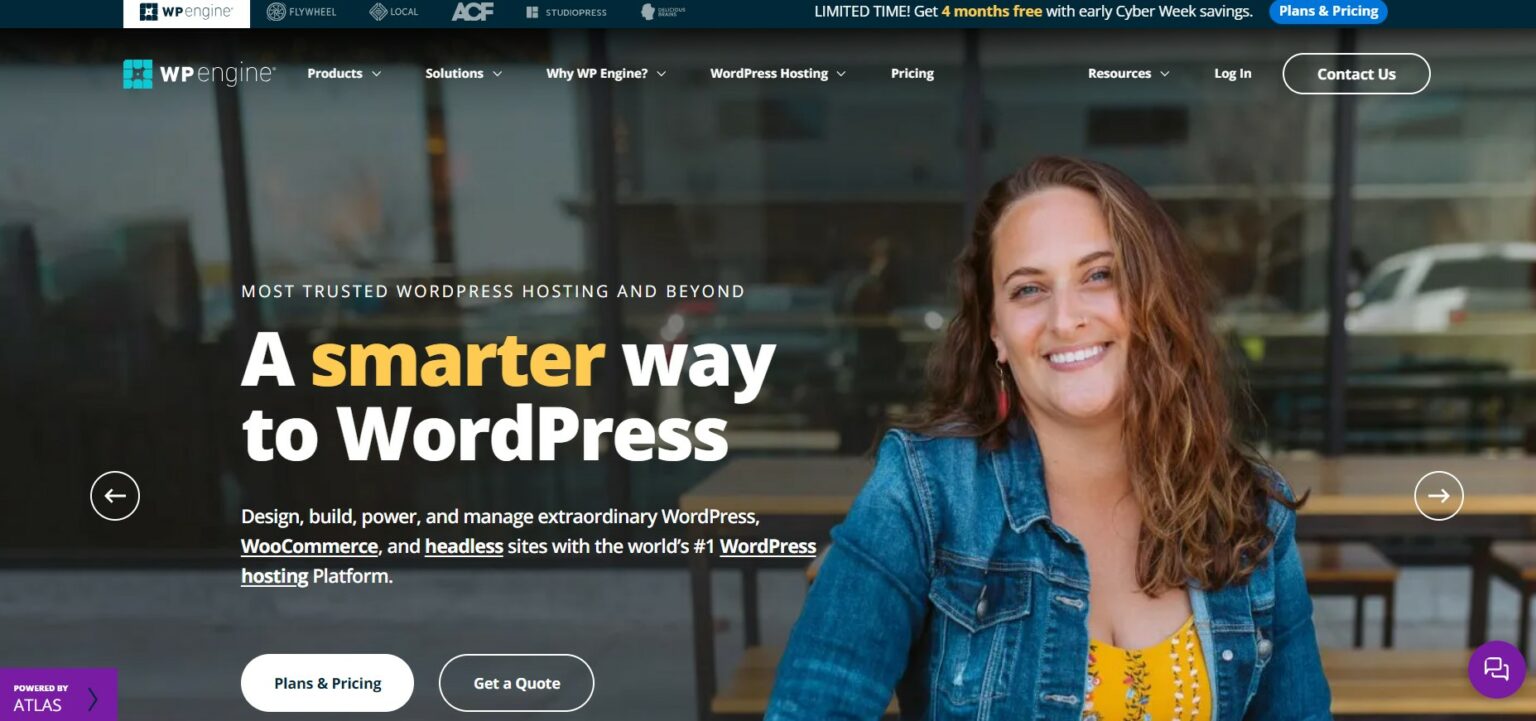
Here is what is going to happen now:
- We are going to head over to WP Engine and log in with your credentials.
- Followed by picking a hosting plan for your website.
- It has 3 environments, where you can get with standard hosting platforms.
- Install and configure a clean version of WordPress for your hosting setup.
- You will walk through a 100% operational WordPress website.
WP Engine is an advanced hosting solution compared to your regular shared hosting options in the market. This is why some tasks cannot be done automatically, but there are explanations everywhere you go on the tool. However, the tool delivers in terms of ease of use, and its control panel is very appealing and good.
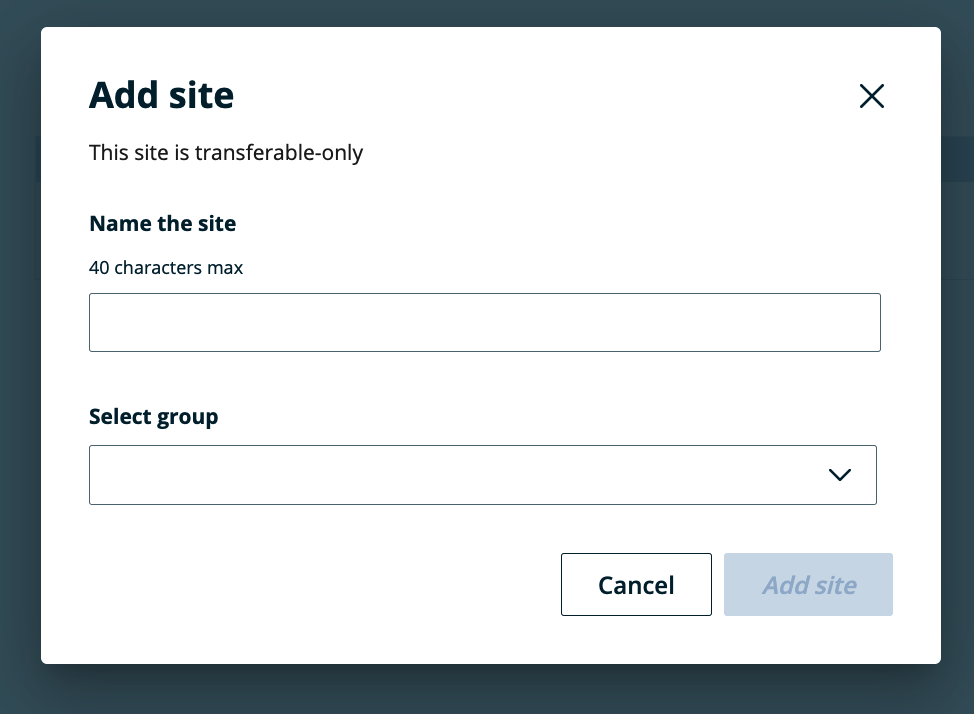
Once you sign up for the software, you’ll see an Add Site button in the right corner. When you click on it, the tool will trigger a pop-up form. This allows you to install a new WordPress item in a simplified manner, and you don’t have to worry about any database settings or technical things.
To sum up the process, you will have to:
- Log in to the User Portal, and follow it by clicking on the installs tab.
- Select Add Install in the navigation bar.
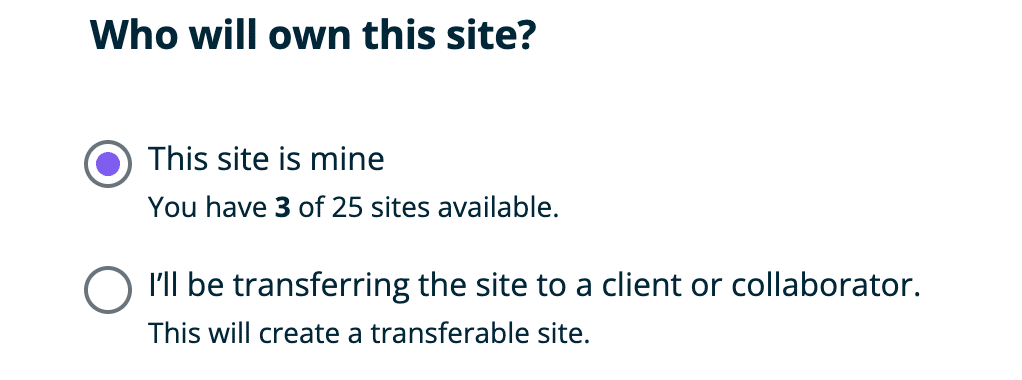
- Select how this site will be used:
a. This site is mine. (Most common) This new site will count towards your account’s site allowance.
b. I’ll be transferring this site to a client or collaborator. Make this site transferable to easily build and transfer it to another WP Engine account. It will not count towards your site allowance and cannot be taken live.
1. Choose a site creation template or option
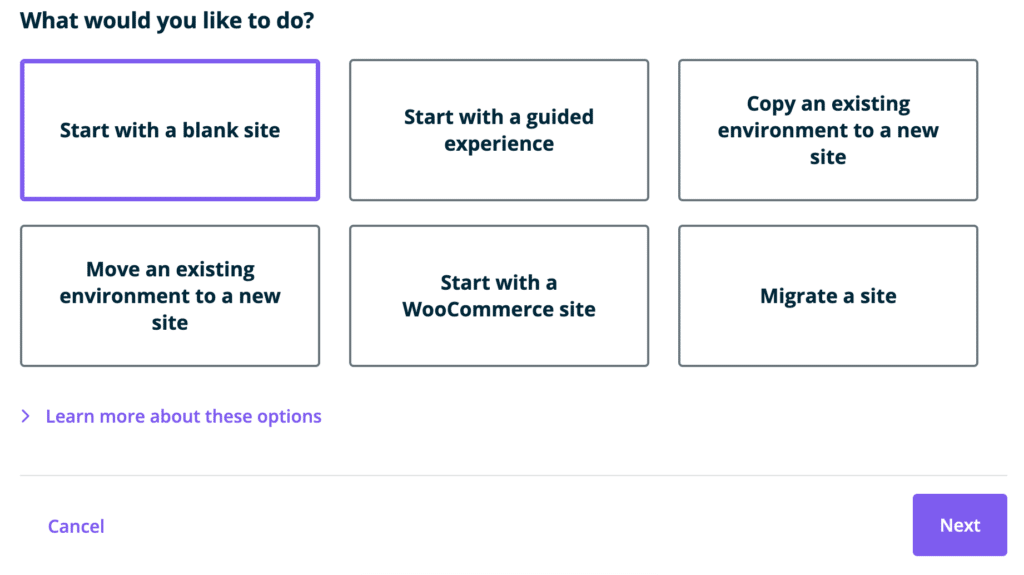
- Start with a blank site: Add an empty WordPress site pre-installed with the (removable) Genesis Pro theme.
- Start with a guided experience: Get up and running faster with site-building tools and sample content.
- Copy a pre-existing environment to the new site: you can use one of the environments as the first environment of your new site without removing it from the original site.
- Migrate an existing site: Move a WordPress site from another hosting provider to WP Engine.
- Start with a WooCommerce site: Create a new site with the WooCommerce plugin already installed.
2. Click Next and fill in the Site name that can be changed at any time
3. Fill in an Environment name
4. Choose an Environment type for your new environment. You can use any type, but there are limitations for non-production environments.
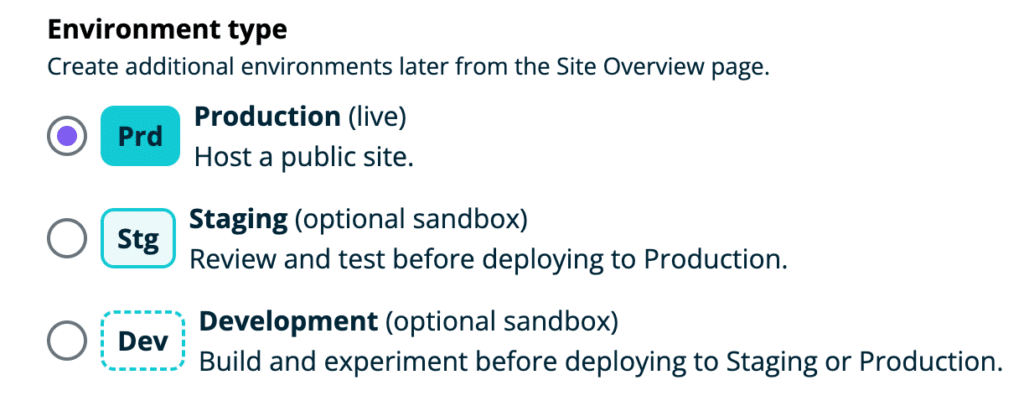
- Production- the environment is intended to be taken live on a custom domain. If the site is transferable, then there can be no custom domain added to it unless you are on a Premium plan.
- Staging- Intended to test the updates or debug any errors.
- Development- This environment is designed for the building and development of your website.
5. Click Add Site, and the creation process will start.
Once you have created a website, you will start using your own custom domains.
1. Add domain to the User Portal
- If your DNS provider supports Domain Connect, you will be prompted to have DNS records configured on your behalf. This will complete steps 1 and 3 at the same time.
- If not, you will be shown your DNS records to be used in step 3 below.
2. Update WordPress URL Settings
3. Change your DNS settings (in Namecheap) to the ones that WP Engine gives you.
2. Install WordPress
There are several web hosts in the market that allow you to install WordPress. However, you’ll require some technical knowledge to get your site up and running.
The good thing is that WP Engine is much easier.
Once your environment has been created to your specifications, you can access it and begin building it out. Your environment’s default domain is formed automatically from the environment name you selected: yourenvironment.wpengine.com.
After you have created an environment, you’ll receive an email that will help complete the setup process of your WordPress admin user. As a user of WordPress, you are assigned the email address of the owner of the WP Engine plan.
To get started
- Log in to the User Portal and click on the Installs tab
- Select Add Install in the navigation bar
- Fill in the details of your site
- Click on Create Install and wait for an email with your new credentials
After that, you can log in to your new WordPress account and start customizing it.
3. Add Themes to Your Website
Themes are basically skins that dictate how your website will look; however, some may include some extra functionality. There are thousands of themes that you can choose from, and many are available for free in the WordPress Theme Directory.
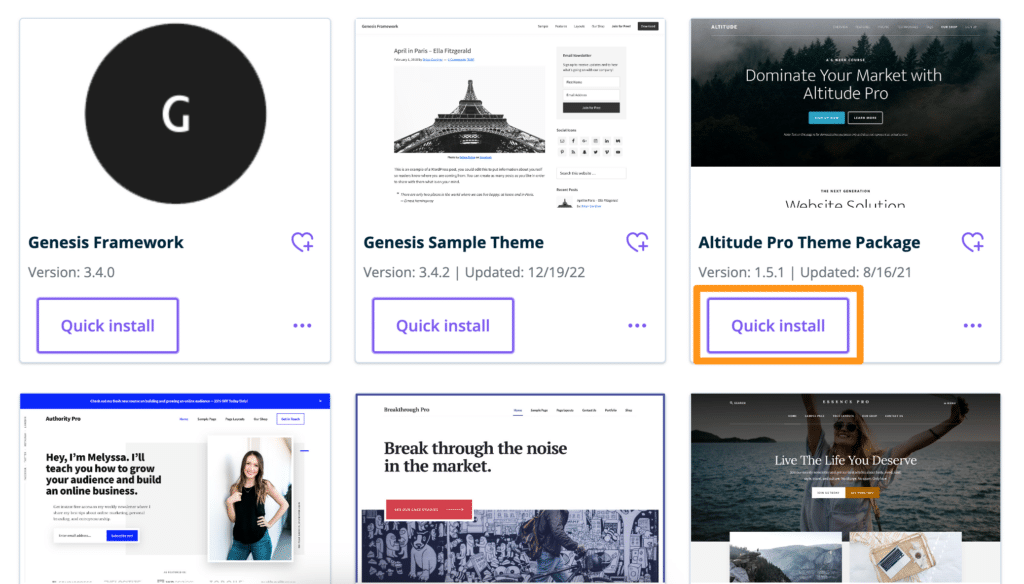
In case you have created a new website with a blank website template, then you’ll notice that you are using the Genesis Pro theme. The themes of WP Engine are designed to be quick and optimized while easily being customizable and elegant in their appearance. This is where your creativity will really shine.
You can select the powerful Genesis Framework and 10 Premium StudioPress themes free of cost from the user portal. The Genesis Blocks have a powerful library of page-building blocks, sections, or full-page layouts in the WordPress block editor. All the blocks are ready to go, and you can utilize them directly to create beautiful websites without requiring any development help.
They have a powerful library of premium blocks that helps take the best out of the block editor and make it better. Editing them has never been so easy with the tool, and it can be customized to fit your brand needs.
If you have the budget, then you can purchase from a premium site like ThemeForest (I like Avada). The themes offer greater support with frequent updates to stay updated with WordPress trends.
In case you want to customize themes, then you’ll need extensive programming knowledge or a sizable budget to hire a developer or designer. Anybody can get free or purchase premium themes; however, custom themes set your website apart from the rest. Regardless of the themes you choose, getting regular updates is a must-have.
When you are evaluating your themes it is a great idea to create must-have themes for your website. This is an excellent way to narrow down your choices. In case you require more flexibility and customization, ensure that you select a theme that is the best fit for your business.
Most themes that are built today are mobile-friendly, but you have to check them before considering them. There is clearly no denying the amount of traffic that is conducted on mobile devices. You will want to ensure that the theme is optimized for your users.
Finally, you will need a handful of checklist items that you will want to look at before selecting any theme. This includes
- Checking its reviews from WordPress users
- Check its compatibility with the site version of WordPress
- Receive regular updates from its developers.
Here’s my personal list of my favorite WordPress Themes in 2024
a. WordPress Theme Installation
Once you have selected a theme, you can install it without much hassle. Simply Log in to your WordPress dashboard, follow this by navigating to the Appearance option > Themes screen, and click on Add New at the top of the tool.
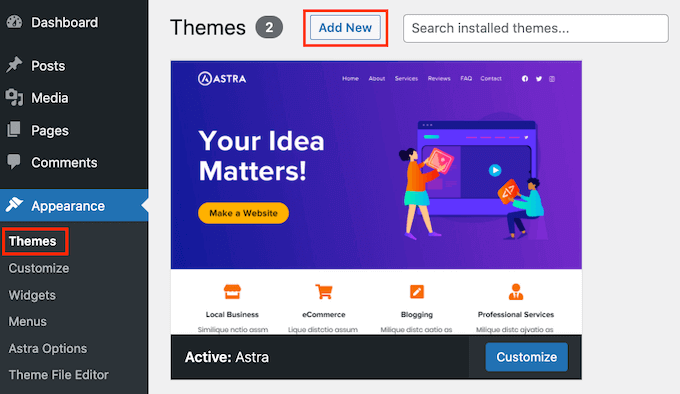
If you have selected a free theme, you can search through the list of options to select one that you like. Follow this by clicking on the blue Install button and clicking on the Activate button, which will install it on your website.
However, if you have purchased the premium theme, then you have to follow a different procedure. The premium themes are packaged as ZIP files that have to be saved on your computer. Simply head over to WordPress, go to the Add Themes screen, and click on the Upload Theme button.
From the initial get-go, select a theme file and choose Install Now. Once the theme has been installed, activate the theme for your site.
If you want to switch the theme, you have to head over to the Appearance> Themes screen and click activate on the theme you want to use. You can do it as many times as you like; however, you’ll need to check the content afterward to ensure it looks good.
b. Customize the Theme
An out-of-the-box look of a theme might seem nice, but you need some basic customizations to fit your requirements. At the start, you may have to deal with a slight learning curve, but it gets intuitive with time.
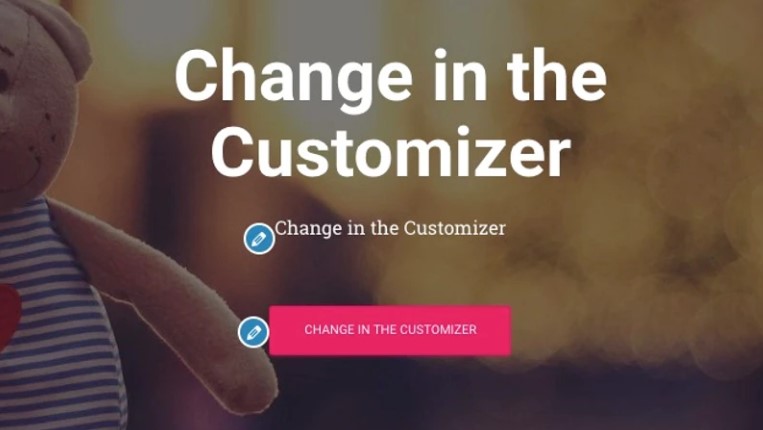
To begin, you simply have to head over to the Appearance and Customize section in the WordPress Customizer interface.
You can fine-tune a load of things from there. Let us start with the homepage, as it is the most representative.
- Go to Homepage Settings in the sidebar
- Select a static page under the homepage display setting
- Click on Add New to create a new page that acts as a homepage
- Input the name of the page, and click on Add
This will replace the default listing of the most recent articles with your custom homepage. By default, you will get access to cool elements on the new user-friendly homepage. They look great on different devices.
1. Headline
Let us begin with the main headline on the page. It is a great idea to put the name of your business or anything about your niche.
To make any changes to it click on the pencil icon next to the headline. Using it, you can change:
- The title
- Background image
- Text under the title (you can remove it completely if needed)
- Button text
Under this section, you can easily adjust your available homepage blocks, and it works like popular website builders. By default, you get
- The Features section is great for explaining the offering of your company on what is the purpose of the website.
- The About section is great for talking about your story.
- The Team section is good if more people work in your business and you want to highlight them.
- Ribbon is another place where users can mention your call to action.
- The Testimonial section is awesome to showcase what your previous customers have to say about your business.
- The contact section is another great section where you can display your contact information and learn about how to best reach you.
There are also several sections available, and it is best to browse through those and select those that make sense for your business in specific situations.
When you are done, click on the Publish button at the top.
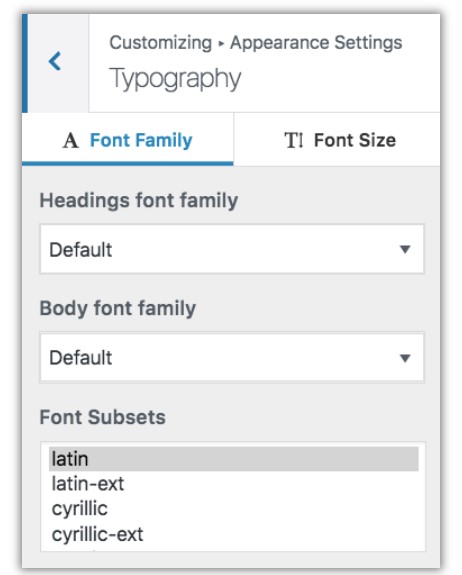
2. Adjust the typography
Typography is another place where you can customize your site. This can be achieved by heading over to the Appearances Settings and heading towards Typography from the WordPress Customizer sidebar. Here, you can pick a font and see it on your site.
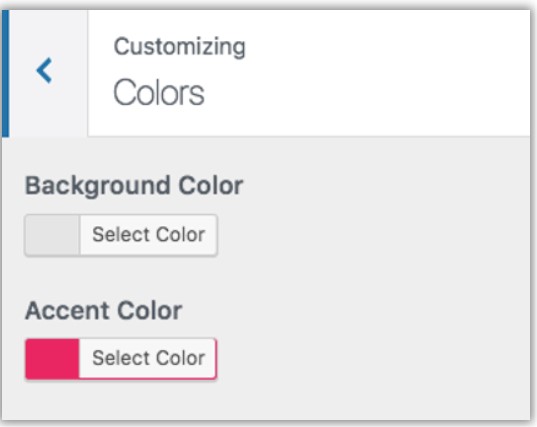
3. Colors
A new theme will have primary colors that define your default color scheme. In the WordPress Customizer, you can click on Colors in the main sidebar. For links and buttons, Accent color is the primary color, and everything else is meant to stand out from the rest of the site design.
After you are done with the above specifications, you can feel that it is truly yours. This will allow you to make the necessary tune-ups and customizations to fit your brand identity.
There are more WordPress Customizer settings to experiment with. It is designed to increase the user experience for instance, you can:
- Pick the default layout as per your website needs- check whether you want a sidebar on the right, left, or elsewhere.
- How do you want the blog listing to be displayed.
- See whether you want the main background image for the entire site.
- The shape of buttons, etc.
c. Update Your WordPress Theme
It is in your interest to keep your WordPress themes updated by downloading new versions when they are released. Theme developers update their products for security and performance optimization. Here is why you should always update your theme.
1. Performance and compatibility
A reputable developer will help continuously improve your theme after its initial release. Most performance updates involve decreasing the load time or patching bugs. This means you can enhance the experience for you and your customers.
Another best practice for updates is to run the latest WordPress version. When WordPress releases new versions of its software, most themes will follow suit and update it to guarantee compatibility. Whenever you update your WordPress version, it is important to update it as well.
2. New Features
Instead of releasing backend performance updates, developers can sometimes add new features or tweak the existing ones. Whether these changes respond to any new WordPress update or request from the community, allowing you to take advantage of it.
3. Safety and Security
The most important thing about keeping your theme updated is to keep you and your users safe. Developers constantly patch vulnerabilities whenever they are exposed. Even though an update is insignificant, you should install it as soon as possible as it can contain a vital security patch.
The time needed to update the theme varies whether you have customized it or not. A theme that is not edited will take less than 5 minutes to update. However, for a customized style sheet, it will take you between 15 to 30 minutes.
An important point to keep in mind is that whenever you perform an update, your WordPress website will be unavailable. To minimize downtime for your customers, you should update the theme when the traffic is at its lowest.
There are two best practices that you need to follow to efficiently update your WordPress themes. This includes
- Test changes in a staging environment- Developers test their new release with the latest version of WordPress; however, there is a chance that your updated theme could crash your WordPress website or cause unexpected errors. It is essential to perform updates in a staging environment first.
The staging site is basically an exact duplicate of the live website that is hidden from the public. Hosting platforms like WP Engine offer the easiest way to create one-click staging for your websites.
- Create a backup – Whenever you are ready to complete the update on your live site, it is essential that you create a backup before you proceed. A managed WordPress hosting provider or security plugin can make automatic backups every 24 hours. I would recommend creating a manual backup anytime you make changes to your website.
WP Engine supports automatic WordPress updates, so you will never miss any security patches. The platform has automatic backups and one-click staging sites, making the process as simple as possible. You will have to always update the themes manually, but you can rest easy knowing your website is in the right hands.
4. Add Plugins
Plugins are important components of your WordPress site; what apps are on your iPhone? In simple terms, plugins are components that offer added functionality to your website. There are thousands of plugins to help get the job done. However, it is important to read reviews and ratings to ensure the plugin is of good quality.
To add plugins:
- Select Plugins in the WordPress admin dashboard
- Click Add New
- Select the plugins that you will want to add
- Click Install and activate the plugins
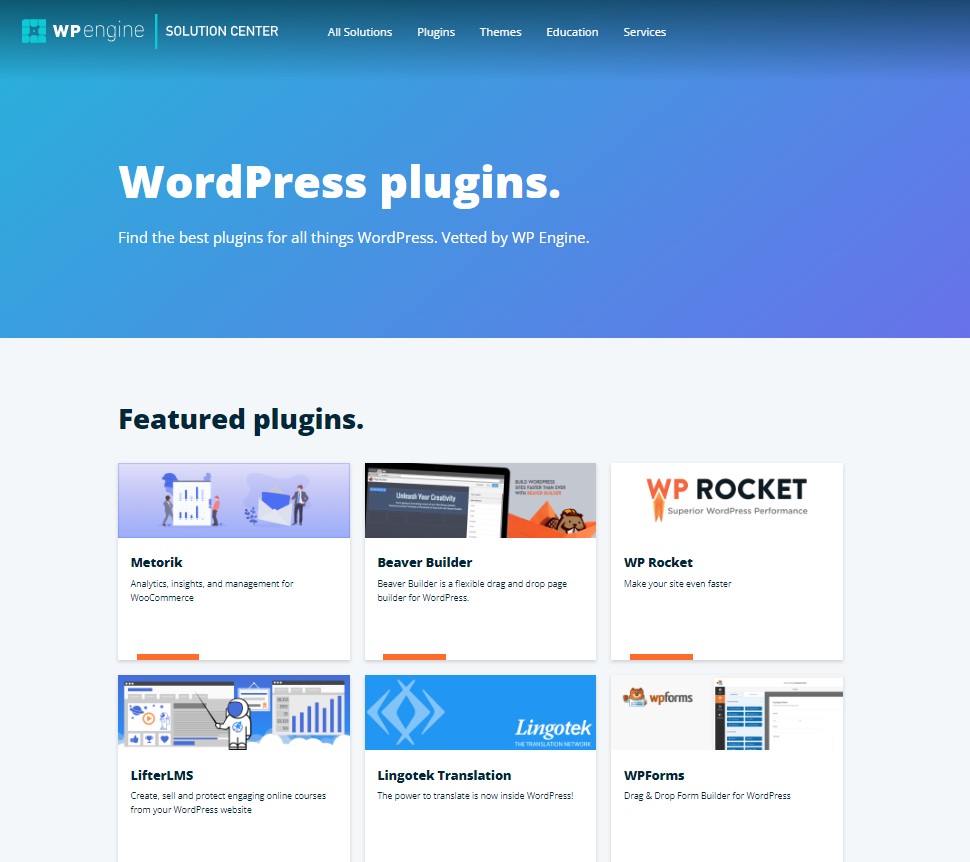
Some of the popular plugins available include:
- Yoast SEO – Easily make SEO tweaks to make your site accessible to search engines in general.
- HubSpot – Capture leads using HubSpot tools like pop-ups, forms, and live chat built on top of the free contact management platform.
- WooCommerce – Create eCommerce capabilities for your WordPress websites.
- Google Analytics – Integrates your website with the most popular traffic analytics solution on the web.
- WPForms – Allows you to add an interactive contact form to your website, which your visitors can reach directly, which is better than displaying your email in the plain text of your site.
- Optimole – Optimize your images.
- Advanced custom fields- Create custom editable fields directly on the editor pages.
5. Create Key Pages
There are certain pages that all websites should have, regardless of the niche or goal of the website. Let us understand how to get them ready for your website.
a. Create a Static Home Page
WordPress has two ways that you can present your home page. By default, the site’s home page is made of a list of your most recent blog posts.
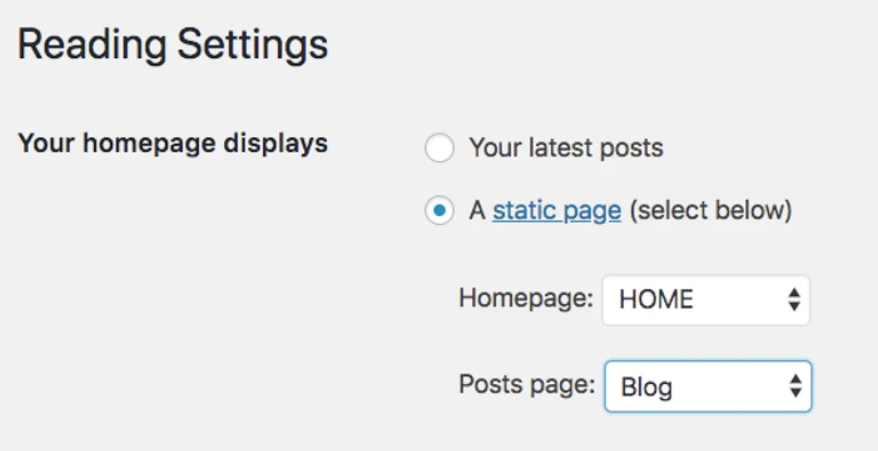
But you can switch over to a static home page by heading over to the settings > Reading screen. Check for radio buttons located under the homepage displays, and select the static page option. In the drop-down menu, users can select any page they want to use.
After you have saved the changes, you can check out your site and see your new home page at the front end of your website.
b. Create an About Page
Creating an About page is simple and straightforward. You will have to head over to Pages > Add New. After you have opened the page, you can set its title and begin designing the content for the page.
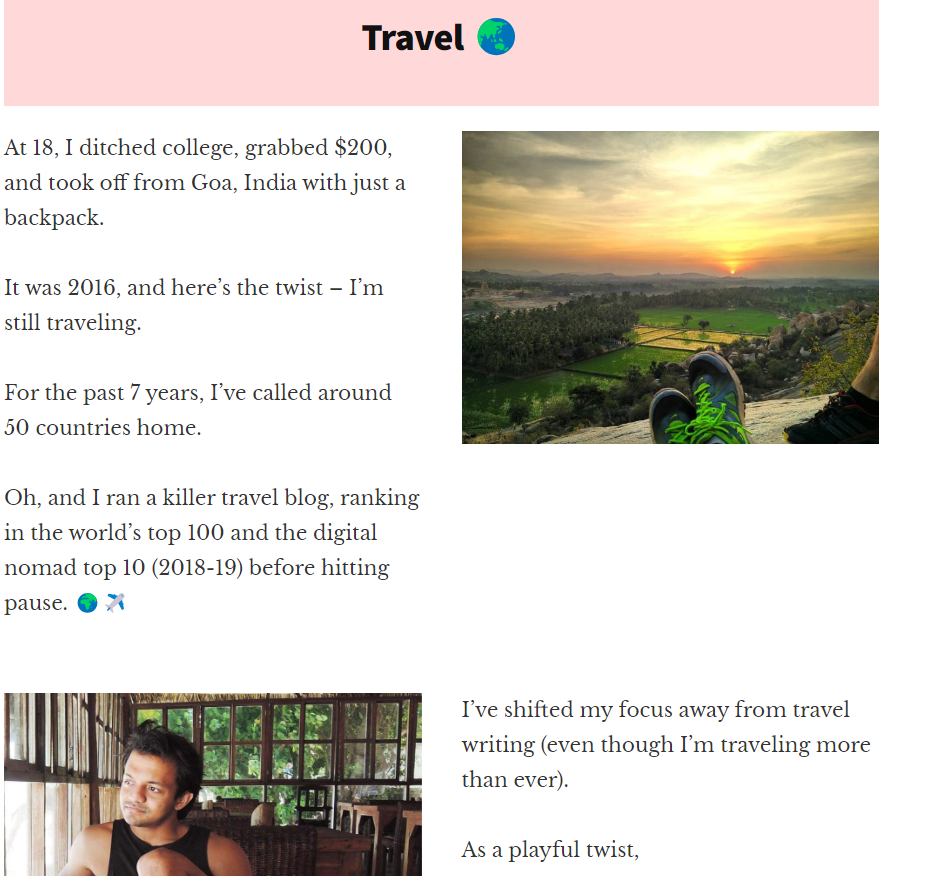
Depending on the purpose of your website, users are able to easily craft your About page to describe your story to your users.
It is important to note that the About page is an important part of marketing your site. This is the first place a customer will go to find out more about your business, so it is essential to create a page that reflects your core values and mission.
c. Create a Contact Page
Another important part of your website is your Contact Page. This place is where your customers or users will ask questions to get in touch with you.
The contact page will be as simple as a page listing your address or phone number, other than some vital information. You can also add a contact form to your pages so visitors are able to send specific requests or information directly.
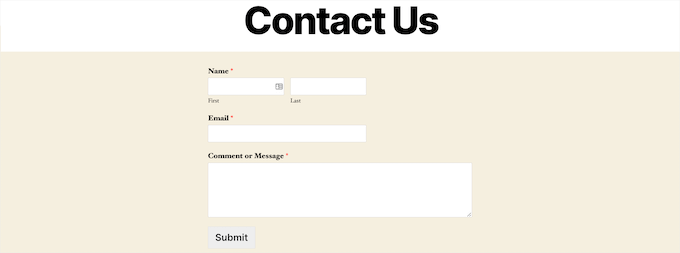
I would recommend that you use a WordPress plugin to create or embed your form. When you utilize a form, you get extra control over what lands in your inbox. This approach allows you to manage spam. Using Contact Forms by WPForms is the quickest way to create a contact form for your site.
Here, you have to navigate to Plugins > Add new in your dashboard and search WPForms. After you click on Install and Activate it, you will be able to create your contact form. The Block editor lets you choose WPForms from the list of blocks and select the form you want to embed on your page.
You can use WPForms to configure the rest of the features of the forms as well as determine where form submissions are sent. To find the options, you’ll need access to the WPForms menu option on the dashboard.
There are also some other pages that you would want to create as per the niche or type of website that you are running.
6. Add Content to your Page
After your WordPress website is set up, you’ll need to learn how to add content to it. This means that you can work with text, images, and videos. We’ll learn more of the same below.
a. Add Text to Your WordPress Site
Before you are able to add text, you’ll need to create a post or a page. Posts are basically designed for blog posts, news articles, or other similar content. On the other hand, pages are designed for content that would rarely change, such as for your Contact or About pages.
To create either of the content, you can hover over Posts or Pages and click on Add New. From here you’ll be pointed to the block editor of WordPress that allows you to create your content. After this, you simply have to start typing, utilizing the toolbar to format your content properly.
b. Add Images to Your WordPress Site
You will certainly want to add images to your site. The simplest way is to directly insert your images into the post or page. The new WordPress Block editor allows adding images as simple as a snap.
To bring the tools you need, you can click on the plus icon, which appears above or below the text if it hovers over a block. After that, you will get the option to choose the Image. Here, you can select your image, adjust its size, or add captions to it.
After that, all you have to do is simply insert it in your post or page, and you are done.
c. Add Videos to Your WordPress Site
WordPress also lets you add videos by uploading them into your media library. Similar to adding images, you can easily add video blocks to your website.
However, loading videos from your hosting is less reliable than using a dedicated video hosting sites, like YouTube, Vimeo, or a course site like Teachable. Fortunately, you can embed the URL and choose the relevant block from the Block Editor menu. Here, you can place the video link, and that is all there is to it.
7. Tags and Categories
WordPress offers an elegant way to organize your content. Categories and tags are part of the taxonomy system.
Let’s understand how to add and manage them.
Categories are the way WordPress classifies posts. They are like chapters in a book that helps organize your content. To assign categories to a post, you simply have to open it up and scroll down until you see the categories in the right-hand sidebar. You can edit your categories in the Posts > Categories screen. Here, you can also delete categories from this screen.

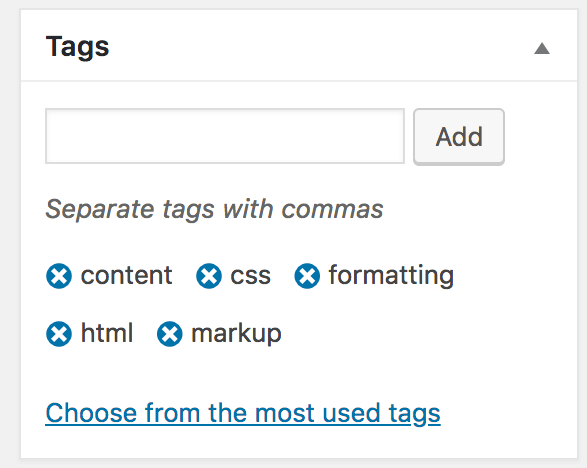
Tags are entries in the book’s index, which are specific terms that describe what your post is about. They are generally short and lowercase.
8. Adjust Your Site Navigation
When you have set all the key pages online, it is great to adjust the navigation of the site to make it easier to consume for your visitors. We will focus on both the elements below.
a. Menus
The menu is the primary area where your visitors navigate through your site. Thus, it is crucial to figure out how to make a menu space. Based on the theme, you have a couple of options in the menu settings.
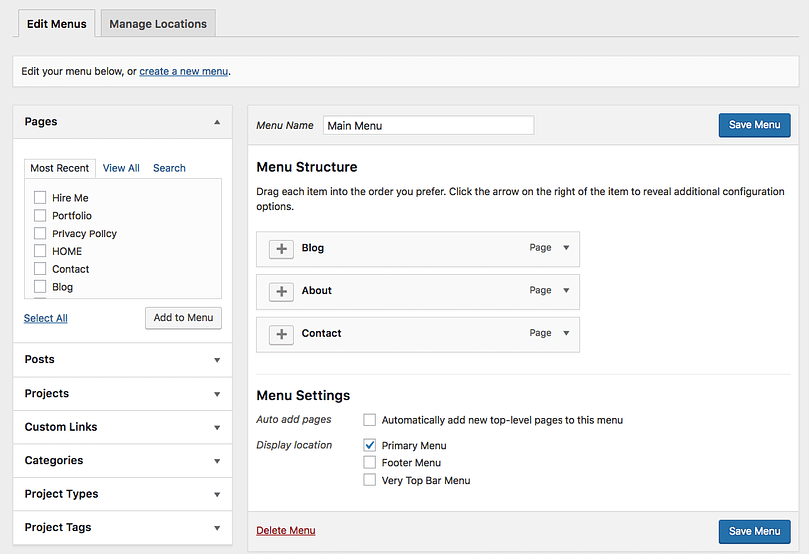
Head over to Appearance > Menus in your WordPress dashboard.
You’ll get to see the default panel.
To the left of the panel, there are pages you can choose from a menu. On the right, you’ll see the menu structure and its settings. Here, you can add key pages to the menu.
b. Widgets
A widget is a small block of content that is seen across various areas of your website. The block is usually seen in the sidebar or footer of the site.
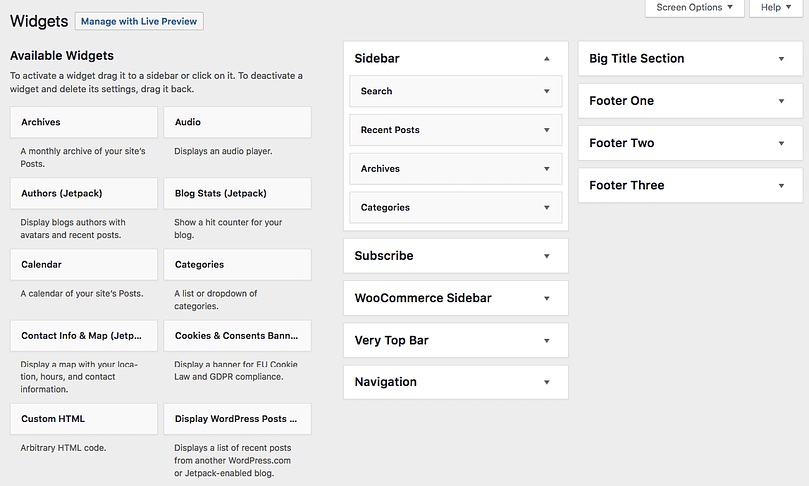
To see what it may look like to set the widgets, head over to Appearance > Widgets in your WordPress dashboard.
Common WordPress Mistakes
WordPress is intuitive; however, there are some common mistakes that new user makes. Here are 5 major pieces of advice to help avoid making those mistakes yourself.
- Update your themes, plugins, or WordPress whenever prompted. This ensures you stay updated and you are not subject to security vulnerabilities.
- Don’t use the default admin username, but select a strong password for your business. These are common weak points when it comes to security breaches.
- Only install the plugins that you require, and make sure you uninstall them when you are no longer using them.
- Create a child theme and test any layout or design before going live with it. Making direct changes to your parent theme or live site can negatively impact your traffic levels.
- Make changes to the default settings of WordPress to fully customize your site. This includes everything from setting up permalinks to implementing branding, etc.
Conclusion
That is it for this article, as I have explained how to start a WordPress website. The good thing is that the process presented allows you to build the website yourself without needing to hire anyone. WordPress is a budget-friendly platform, and coupled with the hosting of WP Engine, it makes the creation of websites a piece of cake.
How To Build WordPress Website FAQs
1. Do I need to know how to use code to use WordPress?
WordPress is one of the simplistic website-building platforms. You don’t need any coding knowledge, but it can help customize websites more efficiently. However, this is not necessary for building a classic website or blog.
2. What is the best hosting platform for WordPress?
WP Engine is among the best WordPress hosting platforms in the market due to its flexible and affordable plans with excellent performance across all avenues.
3. Can you create an eCommerce website using WP Engine?
WP Engine is a versatile WordPress hosting solution with an array of plans. The WooCommerce hosting solution allows users to create a successful and fully functional eCommerce store for their WordPress website.
4. How to create an SEO-Friendly WordPress website?
WordPress is SEO-Friendly on its own out of the box; you can enhance it with tools like Yoast SEO or Rank Math. Further, with its top-quality managed WordPress hosts, you can power your sites immensely.


Leave a Reply