Packing a backpack is an important skill that you don’t necessarily require unless you are walking on a trail with something jamming painfully in your pack. Then you need to find an important item, and you see your water bottle leaking in your small backpack, and it starts to rain, and you forget where you put your dang pack cover—being a little mindful while packing allows you to be comfortable and happy on the trail.
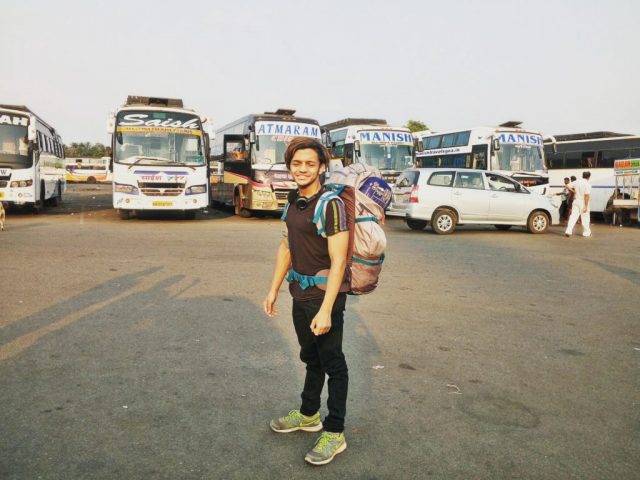
I’ve been living out of a backpack for 8 years after dropping out of college and giving away nearly everything I owned. At the age of 18, all I owned was a 50-liter backpack and less than $200 in savings, and I ended up traveling to different parts of the globe. In this article, I will explain how I pack for my travels and help you experience the beautiful world at its finest glory.
How to Pack a Backpack
1. Choose The Right Backpack
Selecting the right backpack will define how you’ll pack it. I cannot stress this enough. Choosing the right bag goes a long, long way. You need something durable and tough yet light and comfy. Something that can hold volumes of stuff. And you should be able to move about easily with your bag loaded. Having the right bag makes all the difference.
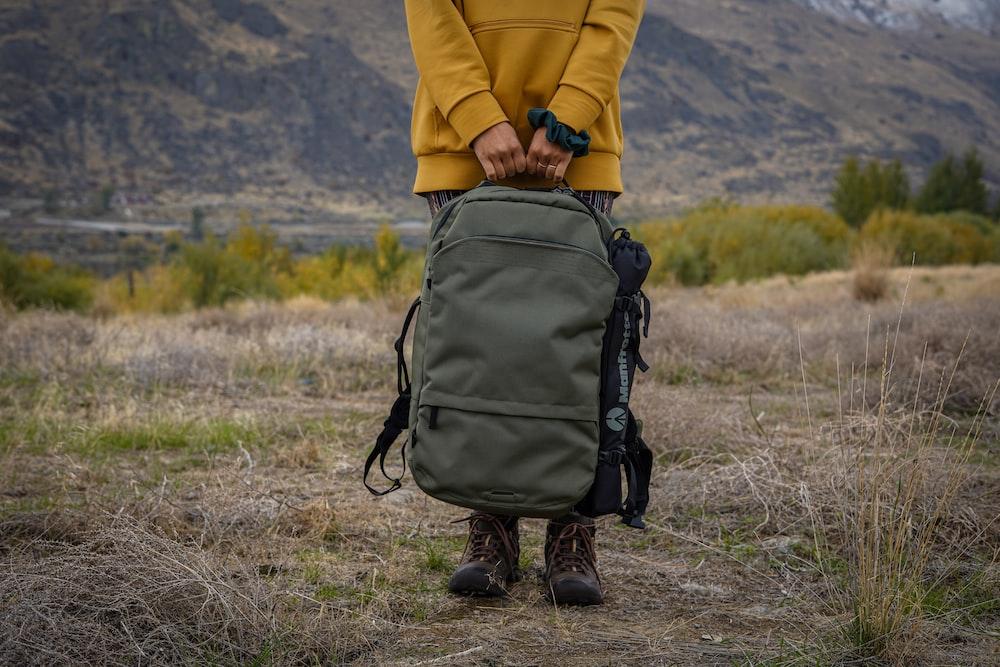
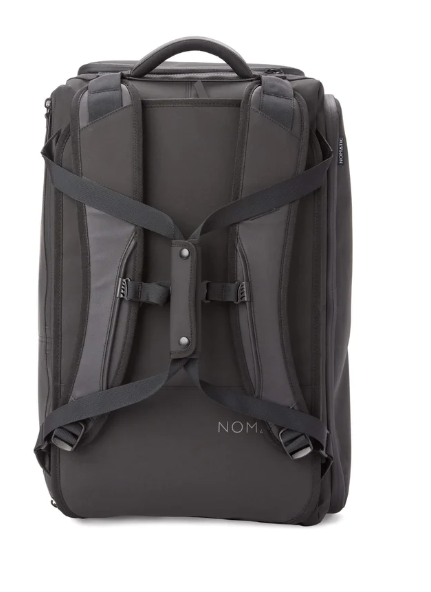
Ever since I have been traveling since 2016, I have tried different backpacks. However, the Nomatic 40L Travel Bag has impressed me a lot. The company believes that they have managed to solve all the issues that exist for most carry-on travel backpacks on the market. It is very versatile and comes with countless attachments that allow you to organize the backpack in a way you find comfortable.
It has lasted me through heavy rainfall, and there’s no other backpack I stand by so much. You can check out my full review of the Nomatic 40L Travel bag here and decide for yourself if you want to get one or not. If you want to learn more about other backpacks, then you can check my article on the best travel backpacks here.
There is a new trend- one-bag travel followed by plenty of people on the internet. Several full-time travelers have been embracing this lifestyle and fully getting into the minimalistic approach of it. In simple terms, you travel with all your belongings in a single carry-on.
Although I couldn’t find much on the origins of One Bagging, I would certainly not recommend this to a novice who’s just started traveling. It’s a little too extreme, and only those experienced should give it a shot.
Also, this may sound weird. I advise you to look at One Bag Travel as a sport. Or a hobby. Somewhat like a fun activity that you will find thrilling. You are doing it for you, and you have got nothing to lose. Your first experience may be a bit rough. But it keeps getting better the more you attempt it.
2. Assembling Gear for your Trip
The season and location of your hiking trip are key parameters to help determine the gear you will need for your travels. If you are traveling to a peak during a summer season where the temperature won’t dip below 50 degrees F, then you can get away carrying a light sleeping bag and less warm clothing. However, if you are traveling to a location that is at elevation or where the weather is less predictable, then you’ll be required to carry clothes and equipment to keep you warm and dry.

If you are planning to pack clothes light, then quick-drying fabrics are great if the weather permits. Sportswear usually lets your skin ‘breathe’ and you feel cooler. It also keeps moisture aware, and they dry pretty quickly. You can’t go wrong if you have a bunch of sportswear. In case you have a good budget, then you should invest in clothing that is crafted using merino wool. The wool is resistant to odor accumulation even after multiple uses but also provides exceptional breathability and a feather-light feel.
The length of the trip primarily affects the food you carry, and the primary gear remains the same. If you are traveling to remote areas, you may need to carry more food and water to meet all your needs. When selecting the food for your trip, ensure you choose a calorie-dense diet to have fuel for your body for longer durations.
If you are traveling with a group, then packing becomes easier as you can share the load of the basic necessities. However, it is necessary that you stick together throughout the entire trip, and everyone has water treatment tablets in case you get lost and are required to treat your water.
3. Pack the Backpack
It’s all about packing smart to get the utmost efficiency. Pack stuff with you that will have more than one purpose. By doing this, you not only hit two birds with one stone, but you also reduce your overall weight. These are important things you need to consider when packing your backpack for your trip.
- Pack in clothes or shorts that are synthetic or nylon. This will double down as swimwear as well as act as nightwear.
- Carry a poncho to act as a raincoat jacket as well as double down as a backpack rain cover.
- ‘Let me grab my Kindle just in case I get time to read’. Trust me when I say this. That ‘just in case’ never works out. If you haven’t read at all this year, it is highly unlikely you’ll be reading this holiday. Ditch that Kindle. You probably won’t need it. Don’t give in to your instincts. It’s another ‘just in case’ that is waiting to happen. If you are not working remotely, ditch the laptop. Even Kindle, for that matter. All the activities that you can do on these devices are accessible through a smartphone as well.
- Carry along a Swiss Army knife, which is the most practical, and ditch all the other supplementary tools like pocket knives, small flashlights, etc. The Swiss Army knife can handle most of the things, and you don’t have to look at other items.
When you get to the packing part, weight distribution is a key parameter you have to consider. Your backpack can be broken down into different zones to better pack your gear for your travels. Essentially, you will need to pack the heaviest item close to the mid-back area to make it stable to gravity and any items that you require actively while hiking.
If a bag is properly balanced, then the hiking process will be safer. In case you lose balance, a poorly packed bag can pull you down, while a well-packed one will help you maintain balance and the center of gravity.
There are four internal weight zones for your backpack that include
1. The Bottom
The bottom area of your backpack is the place where you can store bulky midweight items. You can start with a sleeping bag that will form the base for the rest of the gear to sit inside the pack. Some people will pack the sleeping bags in waterproof stuff sacks, but sticking it at the bottom of the pack is a better option. You can also stuff your clamp clothes and pillow to fill spaces at the bottom of the pack.
Some backpacks come with a dedicated sleeping bag compartment at the bottom with a zipper and a detachable sling to hold your gear above the sleeping bag. Use the sling only if you have an extra place in your pack.
2. Middle Back
The middle back area of the pack is the closest to your back, and all the heavy gear should be placed there. This will be the center of gravity of the pack, which will help keep it stable against your body while you are walking or swinging around to maintain your body balance. The gear that can be placed here includes a tent body, poles, cookware, stove, fuel, and food that you don’t need until you set your camp.
When you are placing the items, make sure that you use the available space, which includes the inside of the materials. There are several pots that can be used to hold a fuel canister and at times, even a small stove. This will help you pack with more efficiency.
If you are going on long trips, then you will be required to carry a hydration reservoir. Water is quite essential, and the middle back area is one of the best areas to store water reservoirs.
A little advice from my side is that you have to fill your water reservoir and place it before any other gear, as it’ll be impossible to do it once the pack is full. There are several backpacks that have a small opening in the shoulder straps for the hose to exit.
3. Front
The front end of your backpack is the furthest away from your body, and the lightest gear should be kept there. You can keep lightweight clothes, clamp towels, and small toiletries that will fill the extra space around the heavy items in the pack. Here, you can utilize clothes to provide insulation around any hard items or gear that you might shift around.
4. Top
The top of the pack is the inside top and the lid of the main pack, which is called the pack’s brain. In this zone, everything should be lighter in weight, which helps keep your pack from being top-heavy. The items should be easy to access, like a first aid kit, snacks, sunscreen, raincoat, or other essential items, so you don’t have to unpack the entire bag when you need some important items.
If you have a bulky or lightweight item like a foam sleeping pad that will not fit in your pack, then you can use the space between the lid and the pack body to place it. Also, ultralight tents can be placed with them, but you cannot place tents of 24 ounces or more to maintain a proper center of gravity.
Pro tip– Before you start packing, make sure the compression straps on the backpack are as loose as possible before you begin the process of packing.
4. Additional Packing Areas
After fully packing your backpack, you might still have some items that are left out. Don’t worry; I’ll help you set the items in place without much hassle.
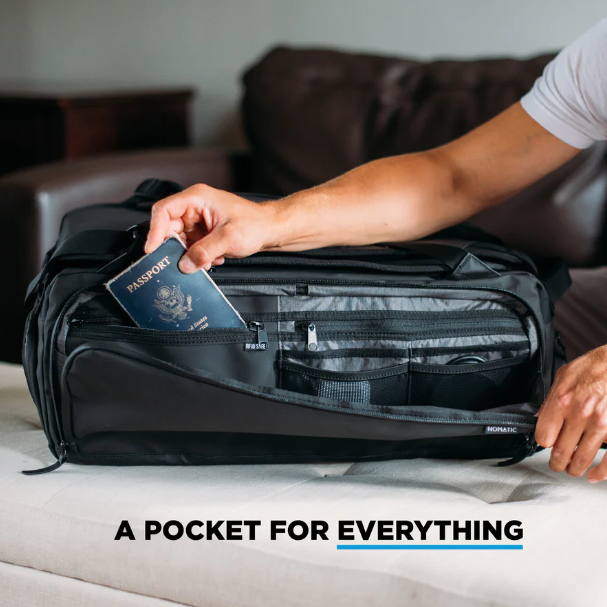
1. Hip Belt Pockets
Backpacks are designed to have pockets in the hip belt area. This is an excellent place to keep small items like a phone, camera, energy bar, or lip balm.
2. Front Pouch
Backpacks come with a stretchy front pouch called a kangaroo pocket, which helps to hold lightweight essentials that can be grabbed quickly. The items that you can place include bathroom kits, rain covers, bandanas, etc. Some items can be stretchy, and you can use them to store crunchable snacks like a bag of chips without causing any damage to them.
3. Side Pockets
Your backpack may have two to four side pockets. They are a great place to keep your water bottles and can be reached without taking off your pack based on your flexibility. It is also great to manage your fishing rods or tent poles.
4. Loops and Cinch Cords
Backpacks come with elastic cinches and loops to manage extra gear. These cords are great for holding things like trekking poles when you don’t have to use them; others are great for getting creative. Don’t let extra stuff dangling on the pack as it may catch on tree branches and result in annoyance.
Pro tip– hook in a few safety pins to your pack loops, which is great for hanging socks or clothes while you are hiking.
5. Packing Systems and Tricky Items
There are a few packing tricks travelers follow to make packing as swift as things go. Here are some of the things I usually do during my packing escapade.
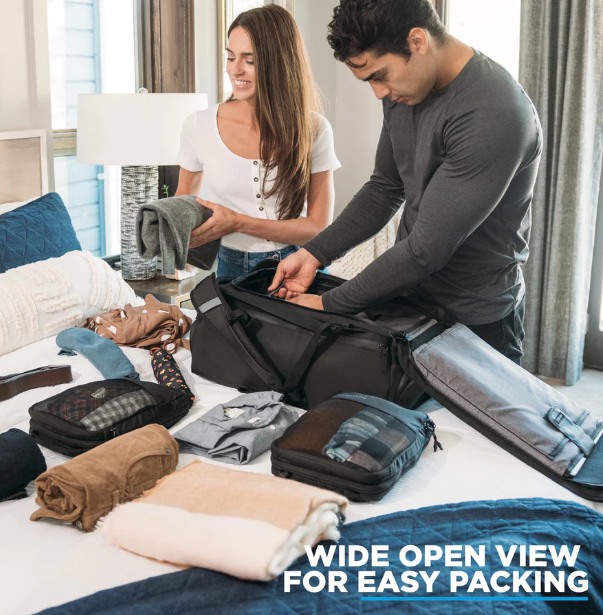
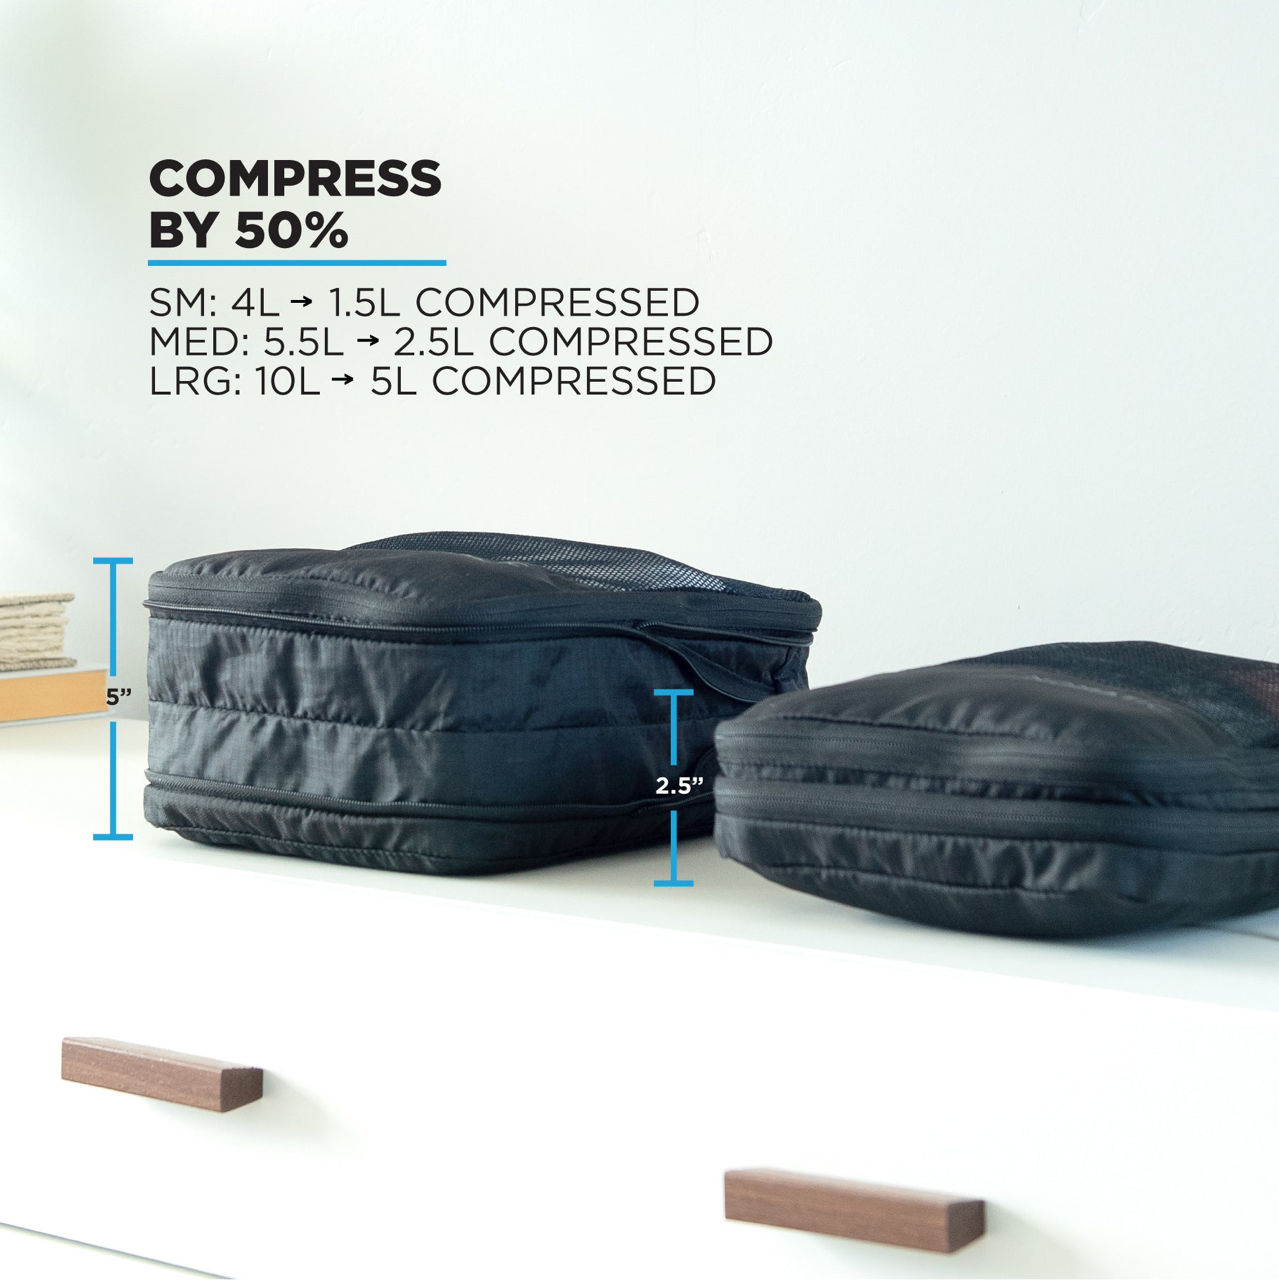
1. Packing Cubes
Packing systems like packing cubes are a personal preference that helps refine your packing over time. Try using packing cubes if you want all your items to fit in snugly. It also gives a sense of higher organization and can be pretty convenient. Pack your bottoms in one packing cube while the top-wear in another cube. You won’t have to rummage through your entire backpack if you need shorts and know where to find them. I highly recommend packing cubes by Nomatic, and you can check out my Nomatic Packing Cube Review I made when I purchased my packing cube, along with the Nomatic 40L Travel Bag.
2. Winter Additions
If you are hiking or camping in the winter, then you will require some extra layers of protection for yourself and your backpack. Your shelter, clothes, food, fuel, and sleeping system will be heavier as you’ll need warmer gear. In the winter, you will burn more calories to keep you warm, so you will require everything more to fuel your body’s furnace. You will also need a stove that will perform even in freezing conditions. All these items will take up more space and make your backpack heavier.
3. Liquid Fuel
Hikers and travelers generally carry canister stoves due to their weight and ease of use. However, some still prefer to carry liquid fuel stoves due to their simple maintenance and all-weather performance. If you carry liquid fuel, make sure that the bottles are located vertically, and keep them away from food in case of spills.
4. Bear Cans
Parks, forests, and wilderness areas that are plagued with bears require you to carry bearproof food protection. This helps protect you as well as bears from damage or energy chews. However, it is important to check with local rangers to ensure that you are following the requirements you are visiting.
The trouble with the bear cans is that they are tough to pack. The best way is to place them vertically in the top area of your sleeping bag so they sit in the middle where the heaviest items are located. There are lightweight bearproof bags with softer sides, but they are not permitted everywhere. Again, you have to check with local authorities to see what is permitted.
6. Waterproofing Your Pack
If it starts raining, you can protect yourself with a rain jacket; however, your pack also needs protection against the elements. The simplest way is to use a waterproof rain cover that covers the outer part of the pack and cinches around the back panel with a cord. Nomatic backpacks are usually waterproof, but they may also offer rain cover to protect against the elements.
The other viable option is to line the inside of the pack for extra protection with a heavy-duty trash compactor bag. The compactor bags are bigger than your normal trash bags and are perfect for keeping water from your gear, especially when the bag is kept on wet ground. They are cheap and light, which makes them a great choice for your trips.
7. Shop Locally
If you going for a long stay and not purely for hiking, then you can shop locally for your food and toiletries. The majority of hotels, Airbnb, and other homestays offer toiletries, and you don’t need to carry the kit altogether.
Having a mindset where you aren’t too attached to materialistic things is simply freeing. You can always find what you need by shopping locally at your destination. However, if you are traveling for a hike, then you’ll need to carry all the things you require.
8. How To Put On a Full Pack
Packing the backpack is one thing; putting a fully loaded pack on your back is a different ball game. Here is the right way to do it.
- Ensure all the compression straps are tightened. Loosen the shoulder straps slightly to easily slip it on.
- Grab the haul loop on the top of the back panel located between the shoulder straps. You can lift the bag using your core and legs, on one thigh with the shoulder straps facing you.
- You can put the other arm through the shoulder strap and shift the pack until the padding touches your shoulder.
- Further, lean forward, slowly ease it on your back, and slide your arm through the other shoulder strap.
- Finally, buckle the hip belt and adjust the straps as per your choice.
How to Pack a Backpack: Conclusion
Packing a backpack for hiking or more will bring a lot of fear to your back. This will always lead you to overpack and usually end up in a big mess. However, it is important to pack as per your needs and select the right backpack to get the best experience for your trip.
I personally recommend using the Nomatic Packing Cubes along with the Nomatic 40L Travel Bag.
The NOMATIC Packing Cubes prove to be reliable travel companions. With a durable build, mesh breathability, and versatile sizes, they align with diverse packing needs. Despite concerns about unbranded zippers and the absence of internal dividers, these cubes shine in practicality.
For a hassle-free journey, they’re a solid choice. If you value flexibility and simplicity, these cubes deliver. So, make an informed decision. Whether you’re a seasoned traveler or a first-timer, the NOMATIC Packing Cubes bring order to your adventures. Happy travels!
Leave a Reply